

Magazine Review: ‘Spotlight’ under the Spotlight
Every few months ELTABB — in its boundless generosity — offers scholarship opportunities to members. And ELTABB members — in their equally boundless humility — refuse to apply for said scholarships. Except that this time, I applied and found myself the lucky recipient of a Spotlight Magazine subscription.
Normally ELTABB directs this funding towards workshops, conference attendance, and other jet-setting pursuits…but 2020 is no normal year. With travel verboten, conferences are out of the question. In their stead, the scholarship can now be used toward teaching materials and magazine subscriptions (bid for champagne and cigars rejected).
(**Seriously ELTABB folks, apply for the scholarship! The money is there for your benefit!’**)
Shedding Light on Spotlight
Spotlight is a magazine aimed at Germans learning English and is published monthly alongside two supplements: Spotlight Plus and an Audio Trainer supplement. It’s a general-interest magazine with a variety of light reading, featuring articles ranging from cake baking to fighting knife crime. Alongside the articles are language pages (courtroom vocabulary; uses of the word ‘about’), episodic stories, reviews, word puzzles, jokes, etc.
Each section is graded from Beginner to Advanced, with a short German introduction and vocabulary offered in translation. Certain sections also have companion audio, with the full audio supplement available at extra cost.
For my subscription, I purchased the base magazine and Spotlight Plus. This is a book full of extra exercises related to the articles in Spotlight itself — reading comprehension tests on the articles, extra practice exercises for the language sections, and so on. I also purchased access to the online back catalogue of both. Thanks to The Virus, online teaching is now de rigueur, and the ability to read the magazine on a computer is pretty much essential.
Placing Spotlight under the Spotlight
Of course, this wealth of material means nothing if it’s no good. So, does Spotlight actually hold up when placed under the spotlight itself?
One important thing to consider — and a shortcoming for us teachers — is that this magazine is for learners, not teachers. As such, it is written with a certain assumed interest on the part of the reader. Whereas a student might buy the magazine simply to enjoy it, a teacher will need to tailor the material to a lesson. In this respect Spotlight Plus is fairly essential: its exercises give the student a reason to read.
However, some of the articles are too lengthy and lacking enough follow-up questions for classroom use without extra preparation. I have found myself reading an interesting article, but without enough time to build a lesson from it. That said, the same is true for any magazine article — compared to selecting an article from a website, at least Spotlight grades the articles by difficulty.
The majority of the magazine is general reading with only a few specific grammar topics, so it’s the luck-of-the-draw whether these will fit into your lesson. If you’re following a syllabus, you might find it hard to incorporate them. If you have creative freedom, however, they can cover useful lexis you might otherwise neglect.
The articles themselves are interesting and engaging. I have found myself reading them simply out of curiosity, and students have expressed interest in buying the magazine themselves. If you can’t find anything directly relevant to your lesson, there will still be something interesting to work from, provided you put in some effort.
Shiny but not all Bright Side
So far, many of these downsides aren’t really the magazine’s fault. I’m a teacher using a students’ magazine — I’m not its target audience. Therefore, I can’t really criticise the magazine for being general interest or not classroom ready.
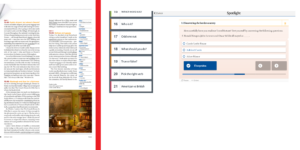
A much more valid criticism is that, aside from the online magazines themselves, the company’s digital presence is challenging. After opening a digital copy of the magazine, everything works smoothly…but the process to do so is painful.
When I first tried to place my subscription, I found that it simply wasn’t listed in the online shop. I could order a print or online subscription, but not both. Also, there was no Spotlight Plus subscription available. Even the shop was hard to find. Eventually, I gave up and ordered by email.
Now that I’m a subscriber, I get the magazine in the post, but finding the online library isn’t easy. Logging in, I can see only a very barebones library — a list of months, with no clue as to the content. I can download PDFs, but not read articles online.
To find the fully-featured library I have to return to the link in my email order confirmation each time. Even then, when I close the magazine it deposits me back into a third online archive, somewhere between the other two, with no clue as to content, but readable online.

Bright when Burning, Hard to Light
This sums up my overall experience with Spotlight: when it shines, it shines bright. It has engaging articles with targeted exercises, covering a range of topics with variety in its supplementary materials. However, like lighting a campfire in the rain, one must put in a lot of work to extract value.
Subscribing and accessing the online catalogue is difficult, and once the magazine is in front of you, you still have to figure out how to adapt it. You can’t choose an article and throw it into a lesson as a matter of convenience. Be prepared to make full, re-usable plans. This much effort is only worth it if the results will last years.
Shadowy Legal Territory
The teacher also needs to remember they are dealing with copyrighted material, so no direct photocopying and sending to students! If you work from the magazine and develop it for teaching, you’re in a bit of a shadowy legal area regarding fair use. If you copy articles verbatim and distribute them to your students, you’d better hope they’re not lawyers.
Conclusion: Prometheus Didn’t Have it Easy
For my part, I enjoy reading the articles, and having each one graded and with supplementary exercises from Spotlight Plus is fantastic!
It still takes an effort, though. The supplementary materials are a starting point, but not comprehensive. The articles are interesting but rarely targeted towards lexis. The grammar pages are useful but scattershot. The online library is huge, but the interface leaves a lot ot be desired.
In short, Spotlight can help when you would normally scour the internet for material to base your lesson on. If you’re lucky, the article will be relevant or even brilliant. Mostly, however, it can only provide the kindling for your own lesson plan.


 Not only can you create professional development opportunities for other teachers, but also, you’ll build lasting relationships with those you’re working alongside.


 Slobodan Kelečević started out as an EFL teacher but has found his true calling in language training and coaching. He is excited to work in this age of great changes in language learning. For more information about him,